Element Tree
It's important to understand how the code written with QuickLayout translates into an element tree.
Each view in the tree can have modifiers applied to it, such as padding or frame, which ultimately affect the view's layout and appearance. These modifiers are applied in the order they appear with each modifier wrapping the previous element with a new element. This means the order in which modifiers are written can alter layout and sizing behaviour.
For example, consider the following view hierarchy:
let colorView = UIView()

var body: Layout {
  colorView
    .padding(16)
    .frame(width: 100, height: 100)
}
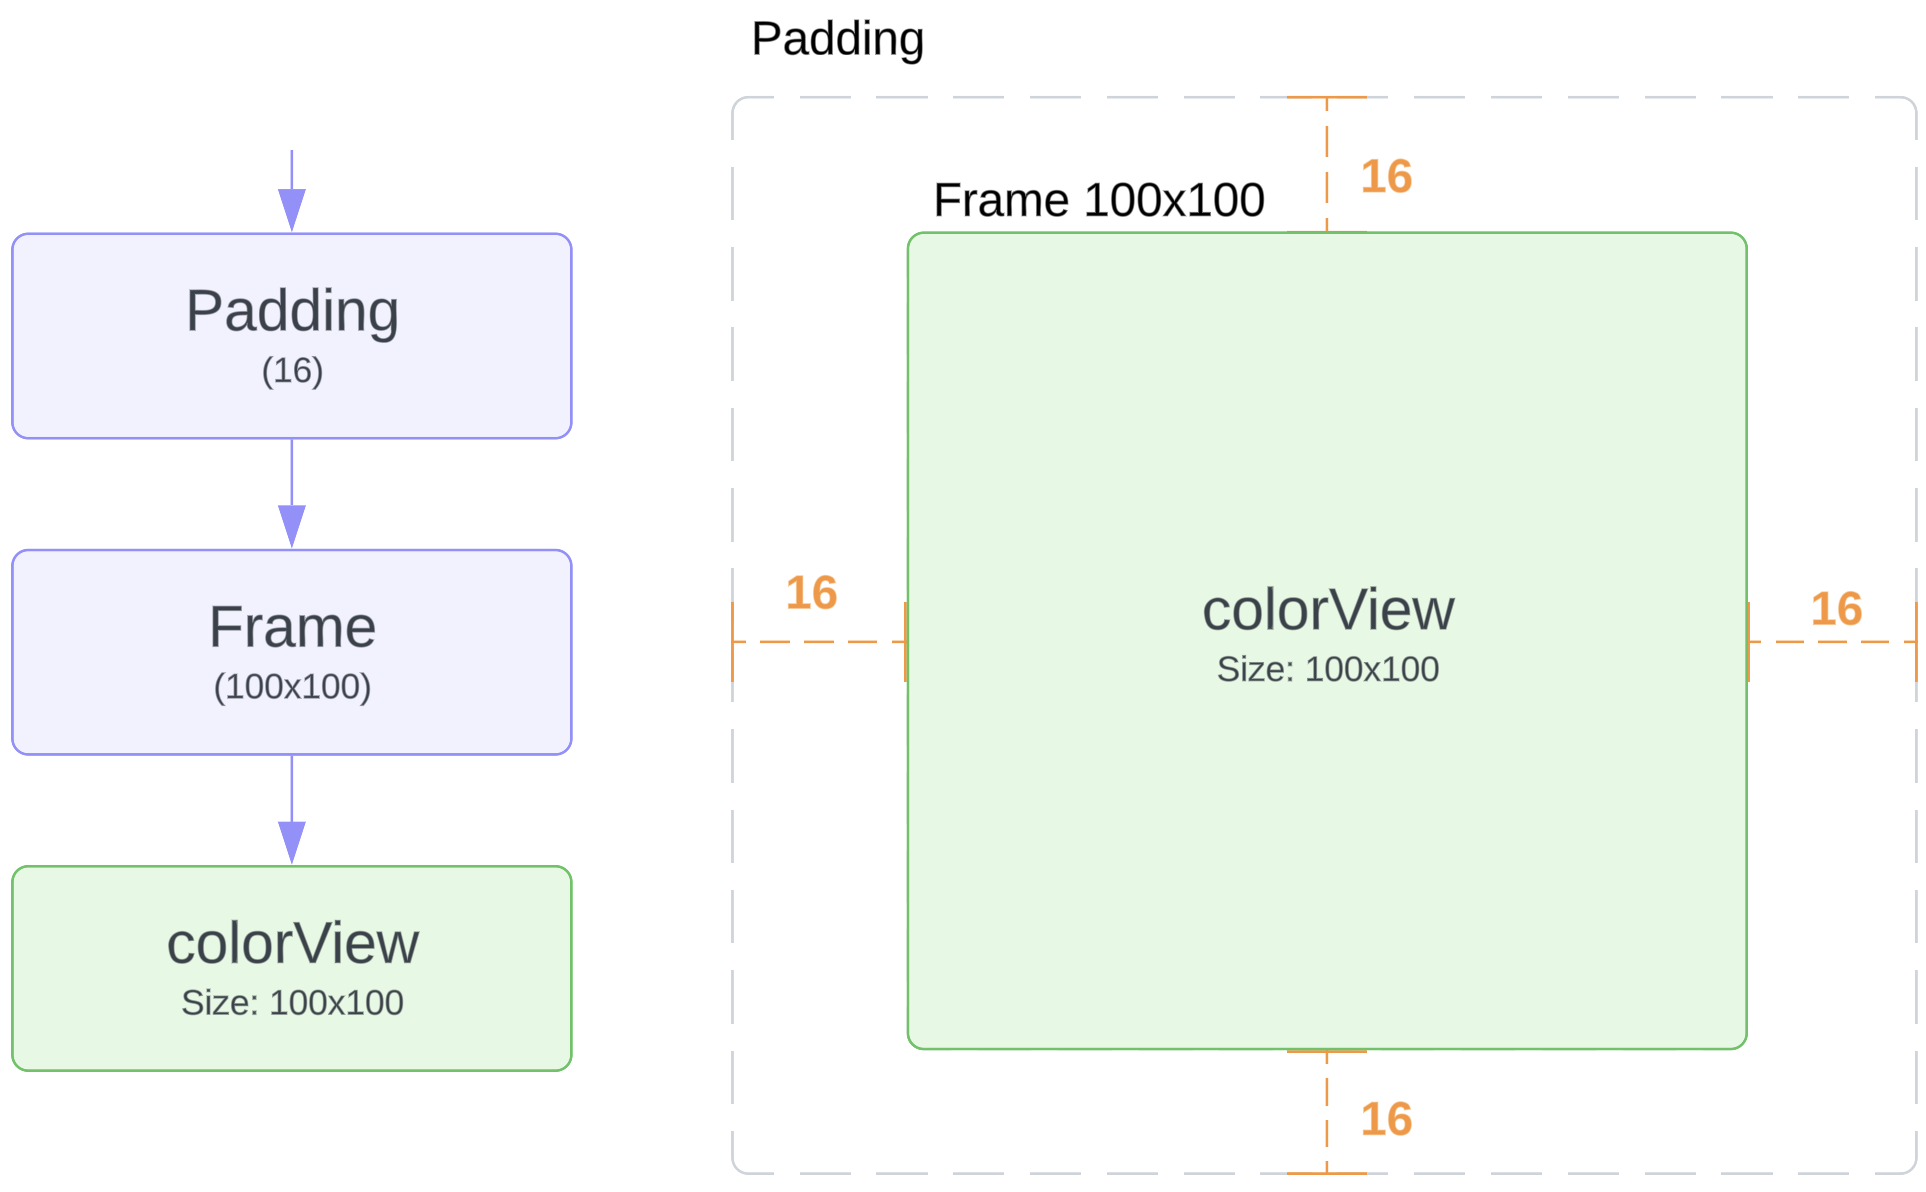
Here, the colorView is first wrapped in a padding modifier, which adds some space around it. Then, the entire padded colorView is wrapped inside a frame modifier. The image below demonstrates the elements tree and layout:

If the order of the padding and the frame modifier is swapped, as in the sample below:
let colorView = UIView()

var body: Layout {
  colorView
    .frame(width: 100, height: 100)
    .padding(16)
}
the element tree will be different and the colorView will have size 100x100:
Order of layout modifiers is important and may result in different layouts.
Let's now consider the following layout with a VStack:
/// Note: each colorView is a plain UIView.
var body: Layout {
  VStack {
    colorView1
    colorView2
    colorView3
  }
  .frame(width: 100, height: 100)
}
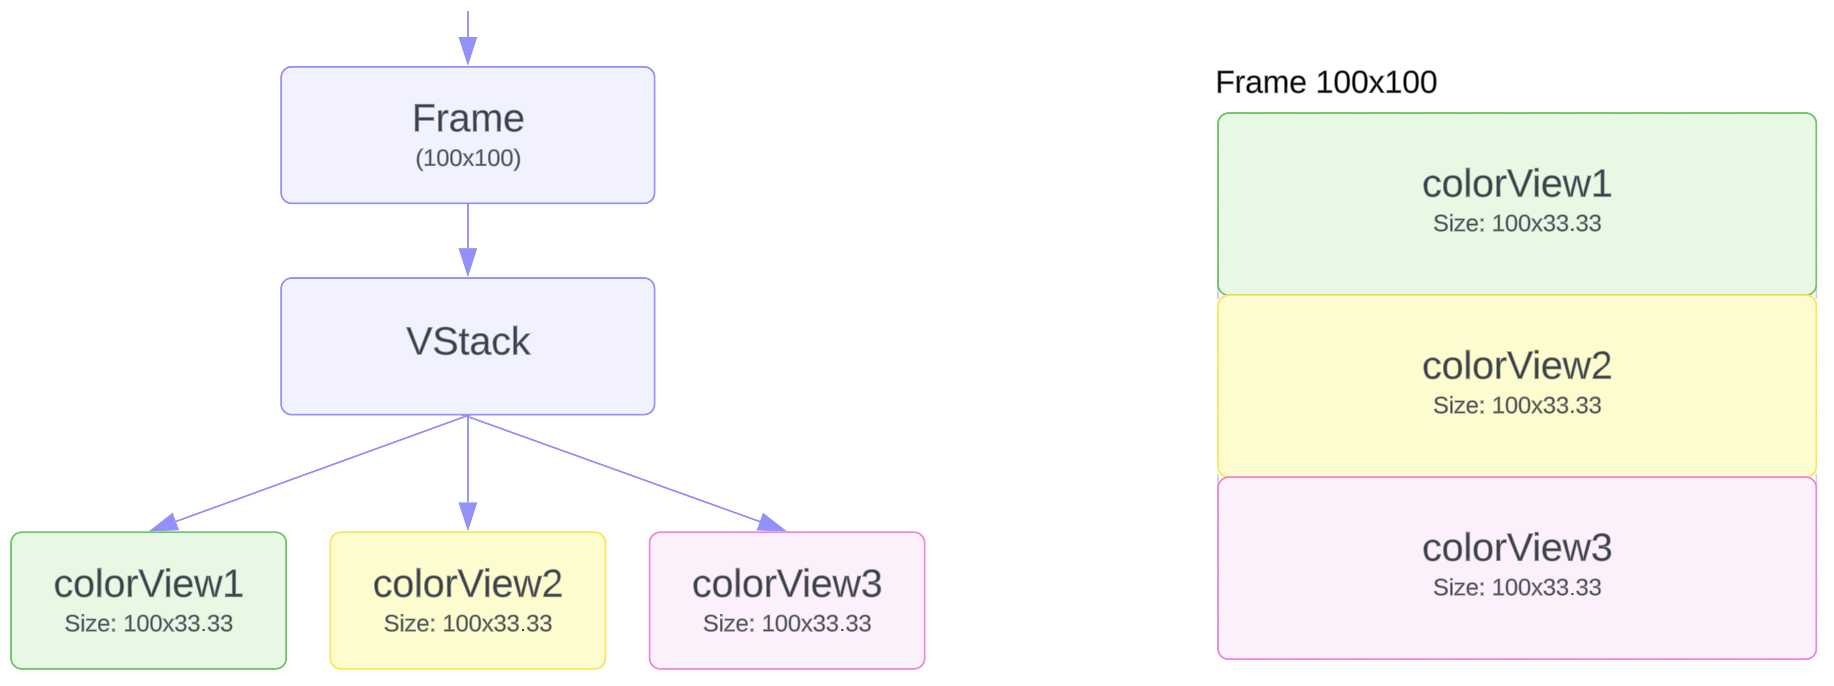
The layout above will make each color view have the same size 100x33.33:
Although, when two colorViews are nested into another VStack, as in the sample below:
/// Note: each colorView is a plain UIView.
var body: Layout {
  VStack {
    colorView1
    VStack {
      colorView2
      colorView3
    }
  }
  .frame(width: 100, height: 100)
}
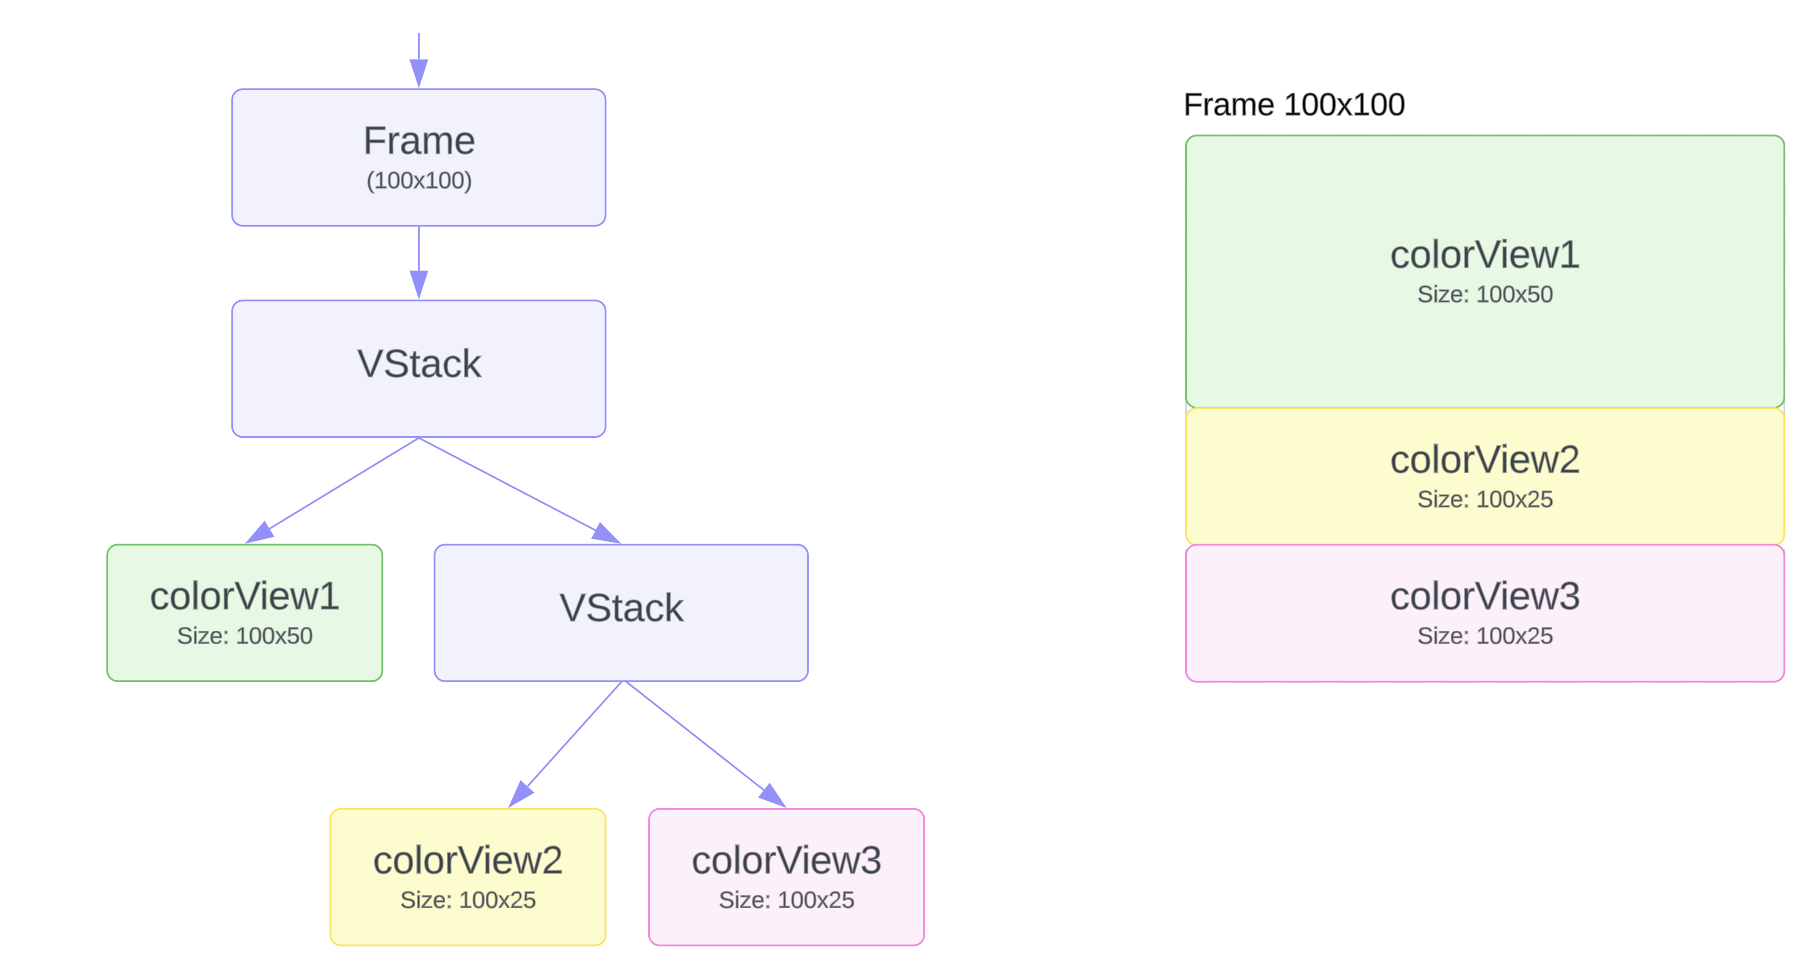
The element tree and the final view sizes will be completely different:
Avoid using Stacks for code organization, because it may lead to a different layout.