Quickstart
QuickLayout is a declarative layout library built to be used with regular UIViews. It can coexist with manual layout methods, allowing for gradual adoption.
Stacks
At the heart of QuickLayout are Stacks:
- VStack layouts child elements vertically,
- HStack positions child elements horizontally.
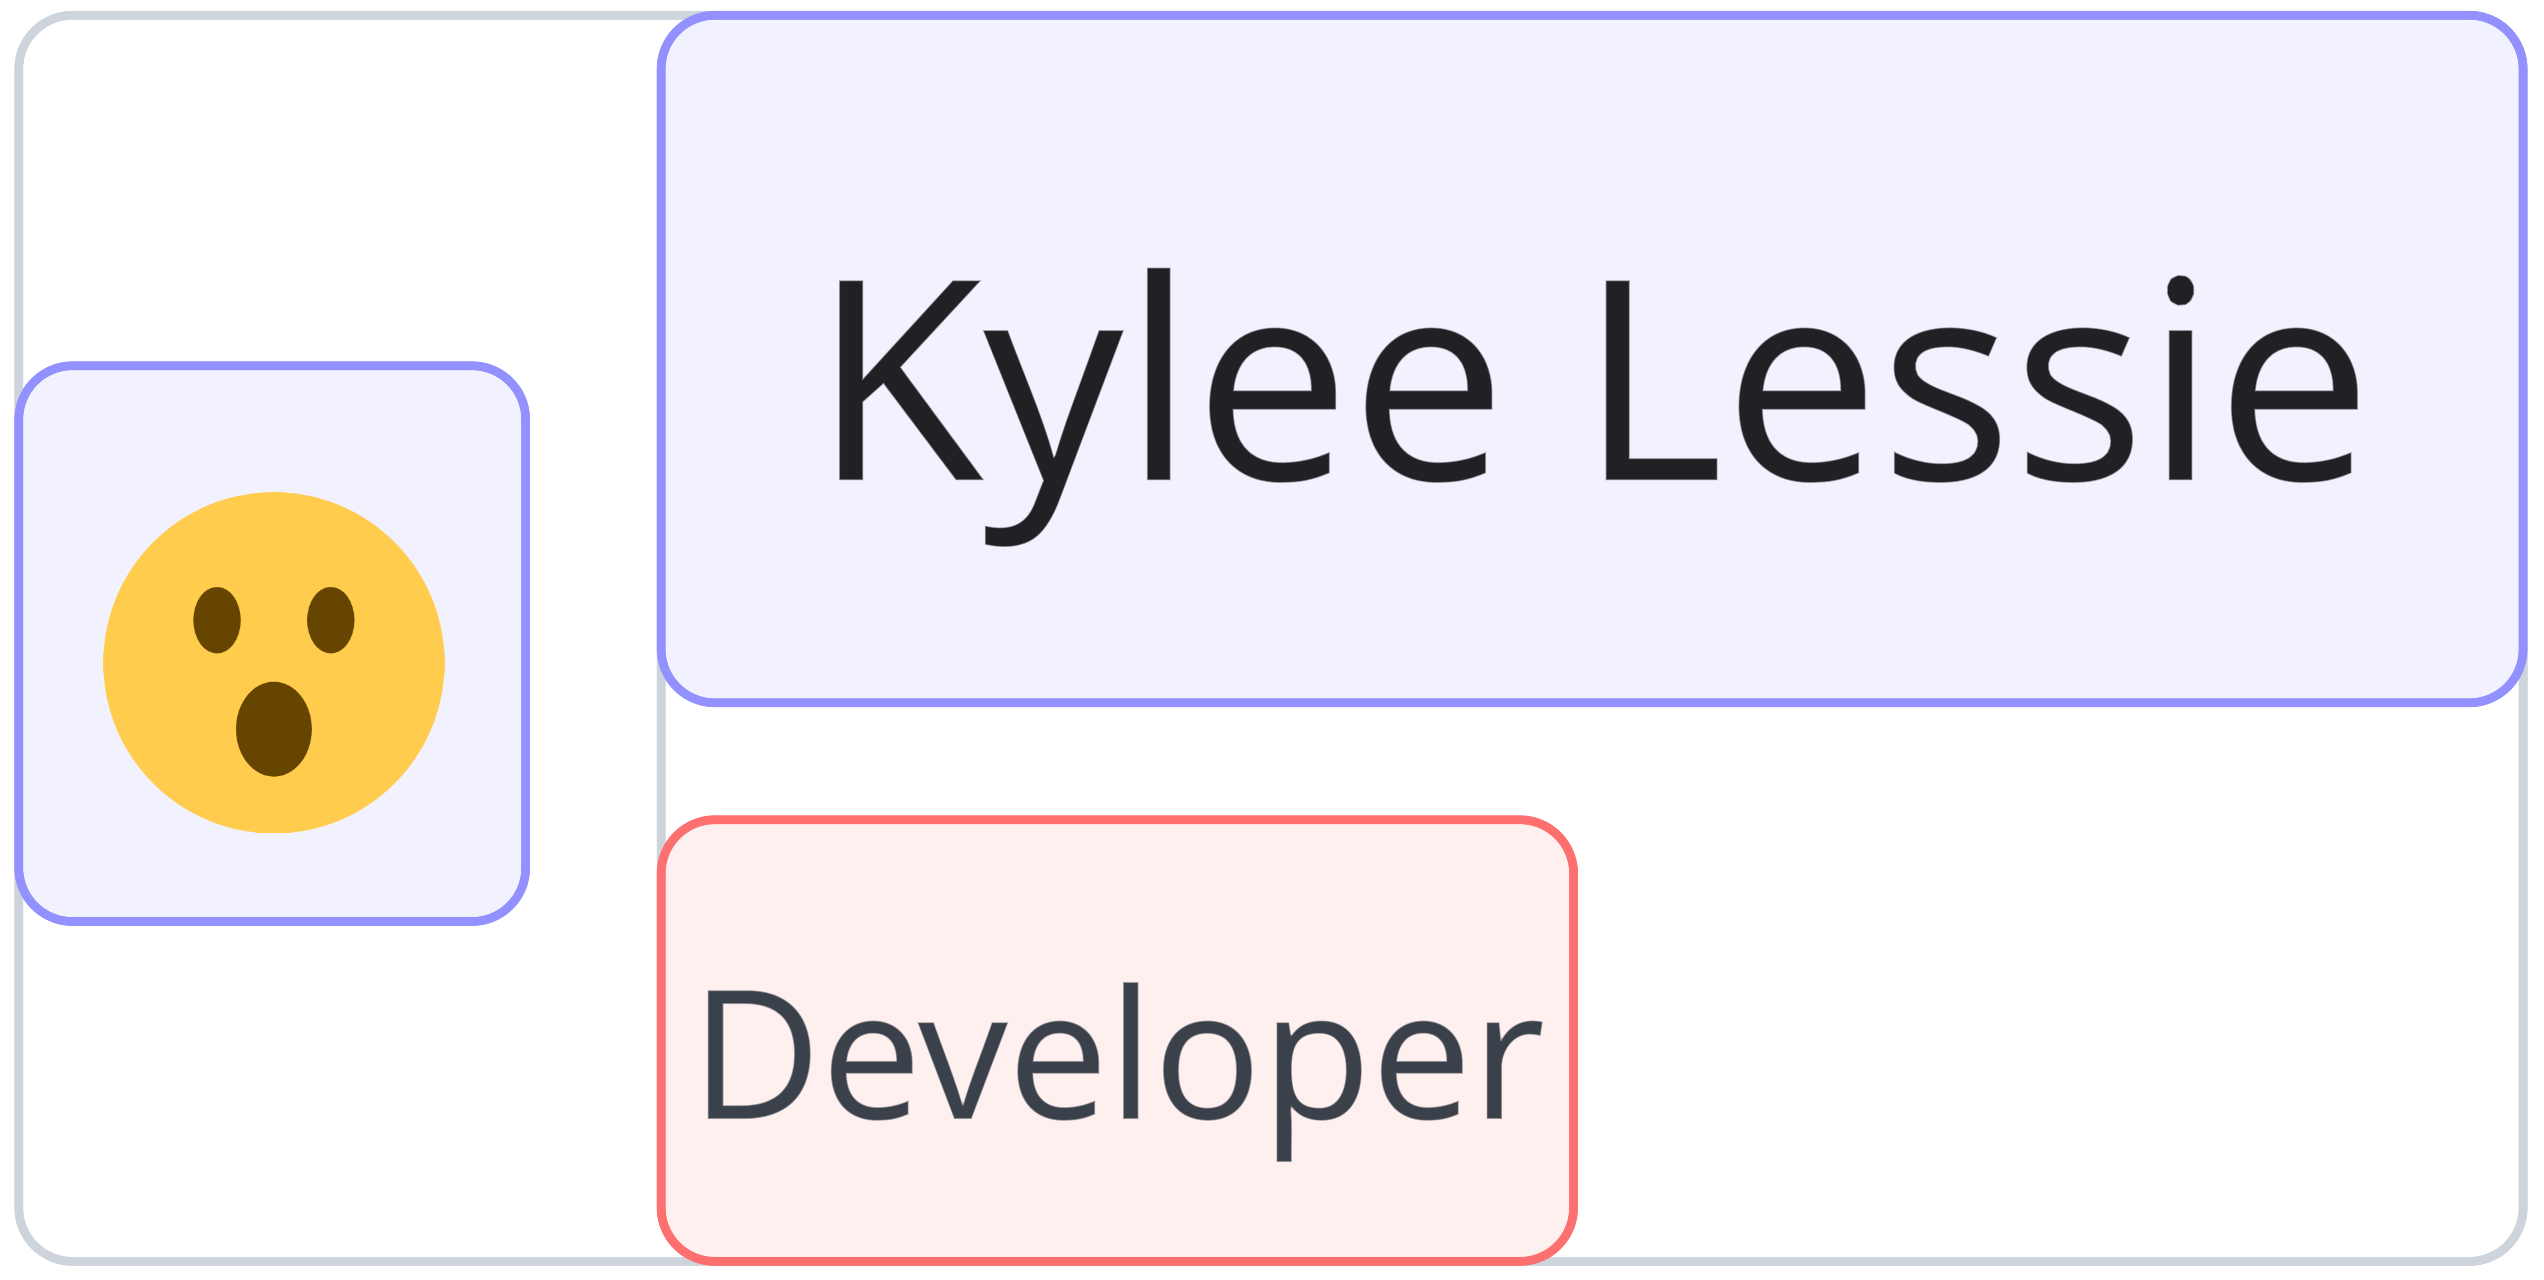
For example, to make the following layout (image below), you can use VStack with leading alignment and spacing of four points:

let label1 = UILabel(text: "Kylee Lessie")
let label2 = UILabel(text: "Developer")

var body: Layout {
  VStack(alignment: .leading, spacing: 4) {
    label1
    label2
  }
}
You can nest Stacks as many times as you wish. For instance, you can add an icon to the left of two labels by using HStack:
let avatarView = UIImage(image: avatarIcon)
let label1 = UILabel(text: "Kylee Lessie")
let label2 = UILabel(text: "Developer")

var body: Layout {
  HStack(spacing: 8) {
    avatarView
    VStack(alignment: .leading, spacing: 4) {
      label1
      label2
    }
  }
}
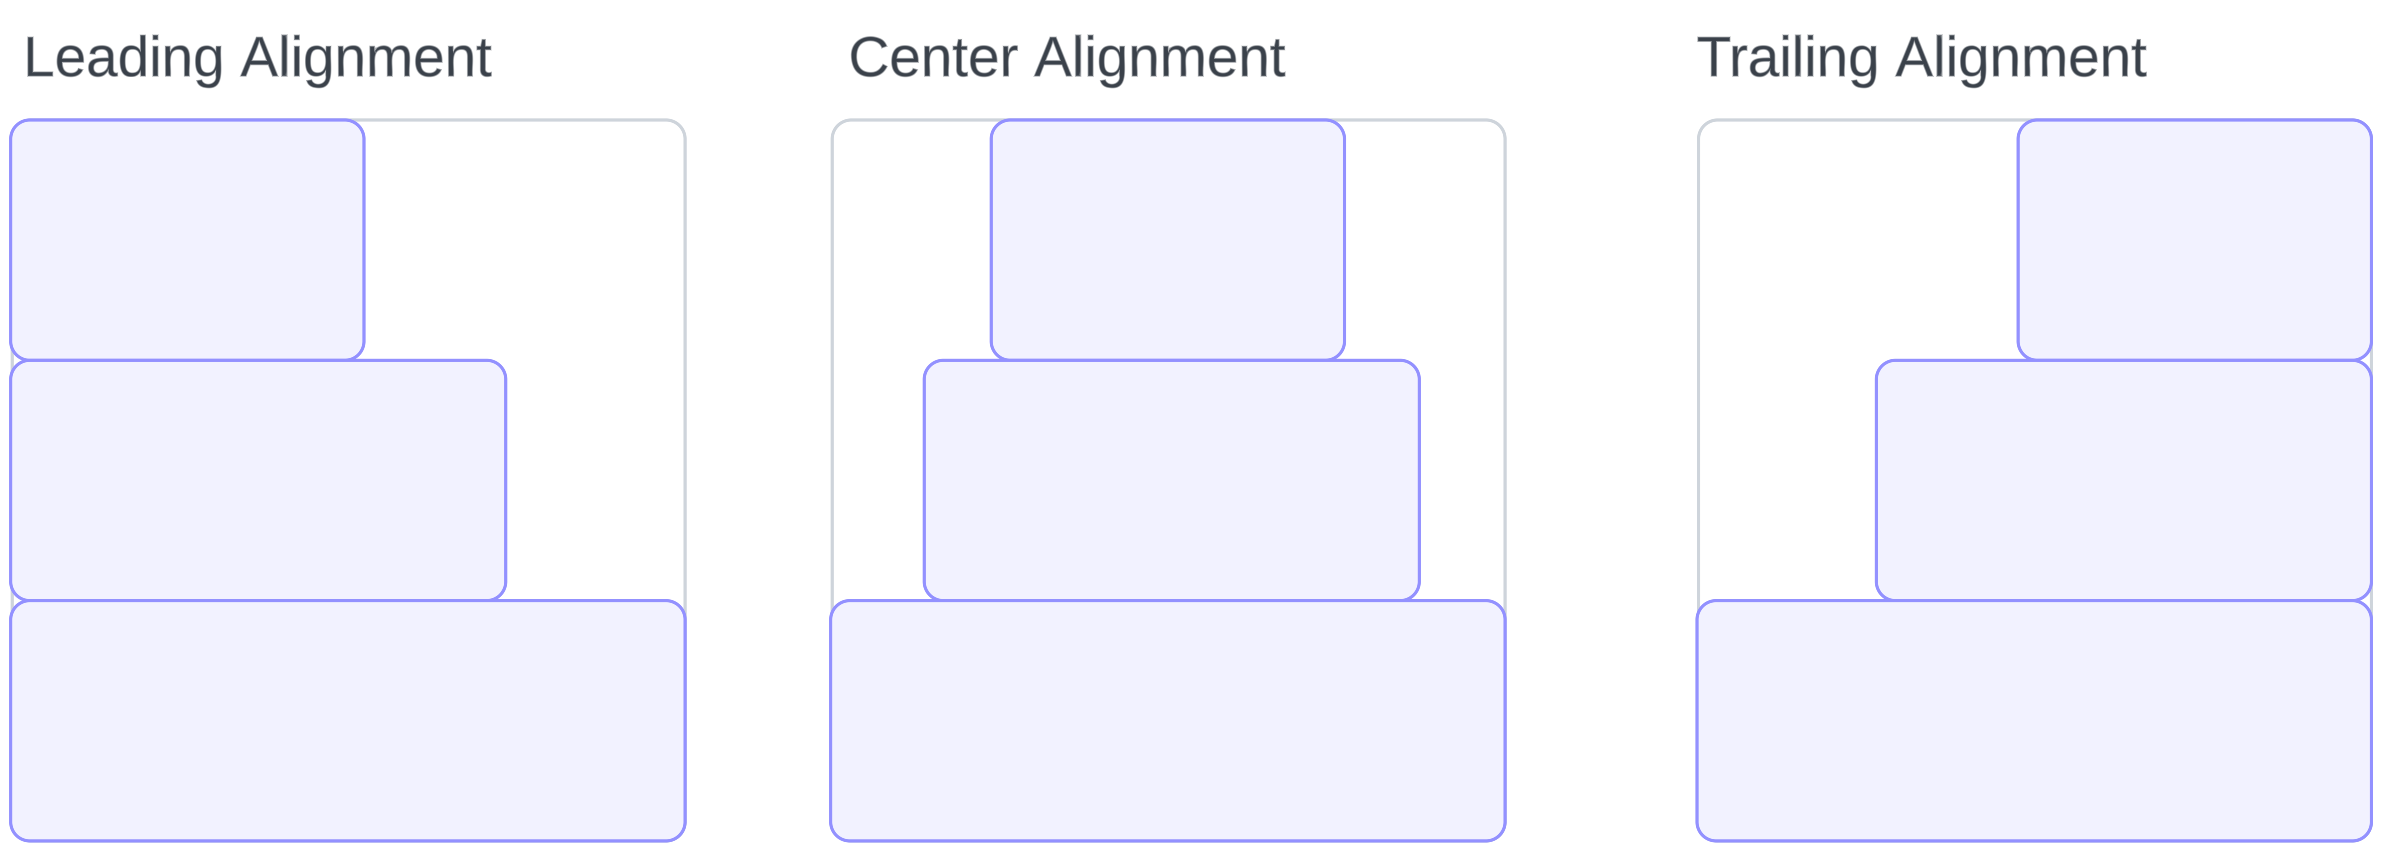
Alignment in Stacks
The alignment property in stacks does not position the stack within its parent; instead, it controls the alignment of the child elements inside the stack.
The alignment property of a VStack only applies to the horizontal alignment of the contained views. Similarly, the alignment property for an HStack only controls the vertical alignment.
Flexible Spacer
A flexible Spacer is an adaptive element that expands as much as possible. For example, when placed within an HStack, a spacer expands horizontally as much as the stack allows, moving sibling views out of the way within the stack’s size limits.

var body: Layout {
  HStack {
    view1
    Spacer()
  }
}

var body: Layout {
  HStack {
    view1
    Spacer()
    view2
  }
}

var body: Layout {
  HStack {
    Spacer()
    view1
  }
}
Fixed spacer and Spacing

A fixed space between views can be specified with a Spacer as in the snippet below:
var body: Layout {
  HStack {
    view1
    Spacer(8)
    view2
    Spacer(8)
    view3
  }
}
You can achieve the same fixed spacing between views using the Stack's spacing parameter:
var body: Layout {
  HStack(spacing: 8) {
    view1
    view2
    view3
  }
}
Padding
A padding can be added to any view or layout element:
var body: Layout {
  HStack(spacing: 8) {
    view1
    view2
    view3
  }
  .padding(.horizontal, 16)
}
Frame
The frame does not directly change the size of the target view, but it acts like a "picture frame" by suggesting the child its size and positioning it inside its bounds. For example, if the UIImageView in the following layout has an icon that is 10x10 points in size, the icon will be surrounded by 45 points of empty space on each side. However, if the icon has a size of 90x90 points, it will be surrounded only by 5 points of empty space on each side.
var body: Layout {
  imageView
    .frame(width: 100, height: 100)
}
To make UIImageView acquire the size of the frame, it needs to be wrapped into resizable modifier:
var body: Layout {
  imageView
    .resizable()
    .frame(width: 100, height: 100)
}